Are you an adventurous soul with dreams of exploring the breathtaking landscapes of New Zealand? Look no further, fellow Israeli citizens! We’ve got your back with our comprehensive guide to obtaining a New Zealand visa. Whether you’re seeking thrilling outdoor adventures or cultural immersion in this Pacific paradise, we’ll navigate through the intricacies and requirements, ensuring your dream journey becomes an unforgettable reality. So pack your bags and join us on this exciting escapade as we unlock the secrets to getting that coveted Kiwi stamp in your passport! NEW ZEALAND VISA FOR ISRAELI CITIZENS
Introduction to the New Zealand Visa for Israeli Citizens
If you are an Israeli citizen looking to travel to New Zealand, you may be wondering what visa requirements you need to fulfill. In this section, we will provide a detailed overview of the New Zealand visa process for Israeli citizens.
Firstly, it is important to note that Israel and New Zealand have a strong diplomatic relationship and citizens of both countries can visit each other’s country without a visa for up to three months. However, if you plan on staying longer or have other intentions such as studying or working in New Zealand, then you will need to apply for the appropriate visa.
Types of Visas Available
There are several types of visas available for Israeli citizens who wish to visit or stay in New Zealand. The type of visa you apply for will depend on your purpose of travel and length of stay. Here are some common types of visas that Israeli citizens may apply for:
1. Visitor Visa: This is the most common type of visa used by tourists and short-term visitors. It allows stays up to 9 months and can be used for tourism, visiting family/friends, business meetings, or attending conferences. NEW ZEALAND VISA FOR NORWEGIAN CITIZENS
2. Student Visa: For those who wish to study in New Zealand for more than 3 months.
3. Work Visa: If you have been offered employment in New Zealand or want to work temporarily while traveling there.
4. Resident Visa: For those planning on immigrating or living permanently in New Zealand.
Submitting Your Application:
Once you have gathered all the necessary documents and completed the required forms, it is time to submit your application for a New Zealand visa. This section will guide you through the steps and requirements for submitting your application.
1. Online or Paper Application:
The first step in submitting your application is to determine whether you will apply online or via paper form. Both options are available for Israeli citizens, but applying online is often faster and more convenient. The New Zealand Immigration website provides a user-friendly platform for online applications, with step-by-step instructions to guide you through the process.
2. Visa Application Center:
If you choose to apply via paper form, you will need to submit your application at a Visa Application Center (VAC). These centers are located in Tel Aviv and Haifa and are responsible for collecting visa applications on behalf of the New Zealand Immigration office. You can find more information about VACs on their website.
3. Required Documents:
Regardless of which method you choose, there are certain documents that must be included in your application. These include:
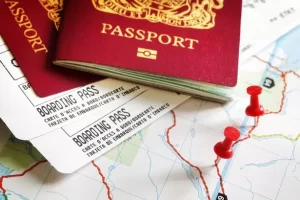
– A valid passport with at least 6 months remaining before expiry.
– A completed visa application form (either online or paper).
– Two recent passport-sized photographs.
– Proof of sufficient funds to cover your stay in New Zealand.
– Travel itinerary or proof of onward travel plans.
– Evidence of health insurance coverage during your stay.
– Police clearance certificate from all countries where you have lived for more than 12 months in the
Paying Fees and Tracking Your Application
Once you have completed your New Zealand visa application as an Israeli citizen, the next step is to pay the required fees and keep track of your application’s progress. This section will provide you with all the necessary information to ensure a smooth and hassle-free payment process and help you stay updated on the status of your visa application.
Payment Methods
The easiest and most convenient way to pay for your New Zealand visa is through online payment. You can pay using Visa, Mastercard, or UnionPay credit or debit card. It is important to note that there may be additional charges from your bank for international transactions.
If online payment is not possible for you, then you can also make a bank transfer or deposit at any ANZ Bank branch in Israel. The details for the bank transfer will be provided in your application confirmation email.
It is recommended to make the payment as soon as possible after submitting your application to avoid any delays in processing time. Keep in mind that the visa fee is non-refundable, even if your application gets rejected.
Tracking Your Application
After submitting your New Zealand visa application, you can track its status by logging into your account on Immigration New Zealand’s website. Simply enter your login details, and under “My Applications,” you will see a list of all current applications with their respective statuses.
You can also opt-in for email updates during the submission process so that you receive notifications about any changes in your visa status.
Tips for a Successful Visa Application Process:
1. Start early: The first and most important tip for a successful visa application process is to start early. It is recommended to begin the process at least 3-6 months before your intended travel date. This will give you enough time to gather all the necessary documents and make any necessary arrangements.
2. Understand the visa requirements: Before applying for a New Zealand visa, it is crucial to understand the specific requirements for Israeli citizens. Visit the official website of Immigration New Zealand or consult with a reputable immigration lawyer to ensure that you have all the necessary documents and meet the eligibility criteria.
3. Complete the application form accurately: The visa application form can be quite complex and lengthy. Make sure to read through each question carefully and provide accurate information. Any mistakes or discrepancies in your application can result in delays or even rejection of your visa.
4. Gather all supporting documents: Along with your completed application form, you will need to submit various supporting documents such as passport, photographs, proof of financial stability, travel itinerary, accommodation details, etc. Make sure you have all these documents ready before starting your application process.
5. Provide evidence of ties to Israel: One of the key factors that immigration officers consider when reviewing visa applications is whether an applicant has strong ties to their home country. Be prepared to provide evidence such as employment letters, property ownership documents, family ties, etc., that prove your intention of returning back to Israel after your visit.